 Shoupapp
Drinkware product photography has a reputation for being difficult. Steel rims throw reflections, lids are half transparent, straws are thin and the handle leaves a gap that has to be cleaned out by hand. This article follows one olive green insulated tumbler from a plain catalog photo to a clean cutout, a styled vertical scene and a five second video, and shows what to check at each step.


Why tumblers and bottles are harder to edit than most products
A t-shirt or a box has one clear outline. A tumbler has several surfaces that each behave differently, and every one of them can go wrong in an edit.
- The steel rim reflects whatever was in the room, so it carries bright highlights and dark streaks that belong to the product and must stay.
- The lid is often tinted or clear plastic. If the edit treats it as background, part of the lid disappears.
- The straw is only a few pixels wide in a catalog photo, and it is easy to lose its tip or its color.
- The handle leaves an enclosed gap. The old background shows through that gap, and it has to be removed as well.
- The coating can be matte, glossy or powder coated, and each finish reacts to light differently.
Studio guides solve these problems with softboxes, diffusion panels and foam boards. Most brands selling drinkware, though, already have a folder of supplier photos and no time to reshoot them. The rest of this article works from that folder.
What a clean tumbler cutout has to get right
A bulk background remover is the first step. It separates the product from its background and returns a transparent image you can place on white, on a color or in a new scene. For drinkware, judge the result on five points:
- The gap inside the handle is fully cleared, with no grey or white patch left behind.
- The straw is complete from the lid to the tip.
- The reflection on the steel rim is kept, because it is what makes the rim read as metal.
- The lid keeps its tint and its shape.
- The base has a clean, flat edge, so a product shadow generator can place the tumbler on a surface naturally.
In the example, the handle gap came out clean and the rim kept its highlight. That result is what makes the cutout reusable across every other format.
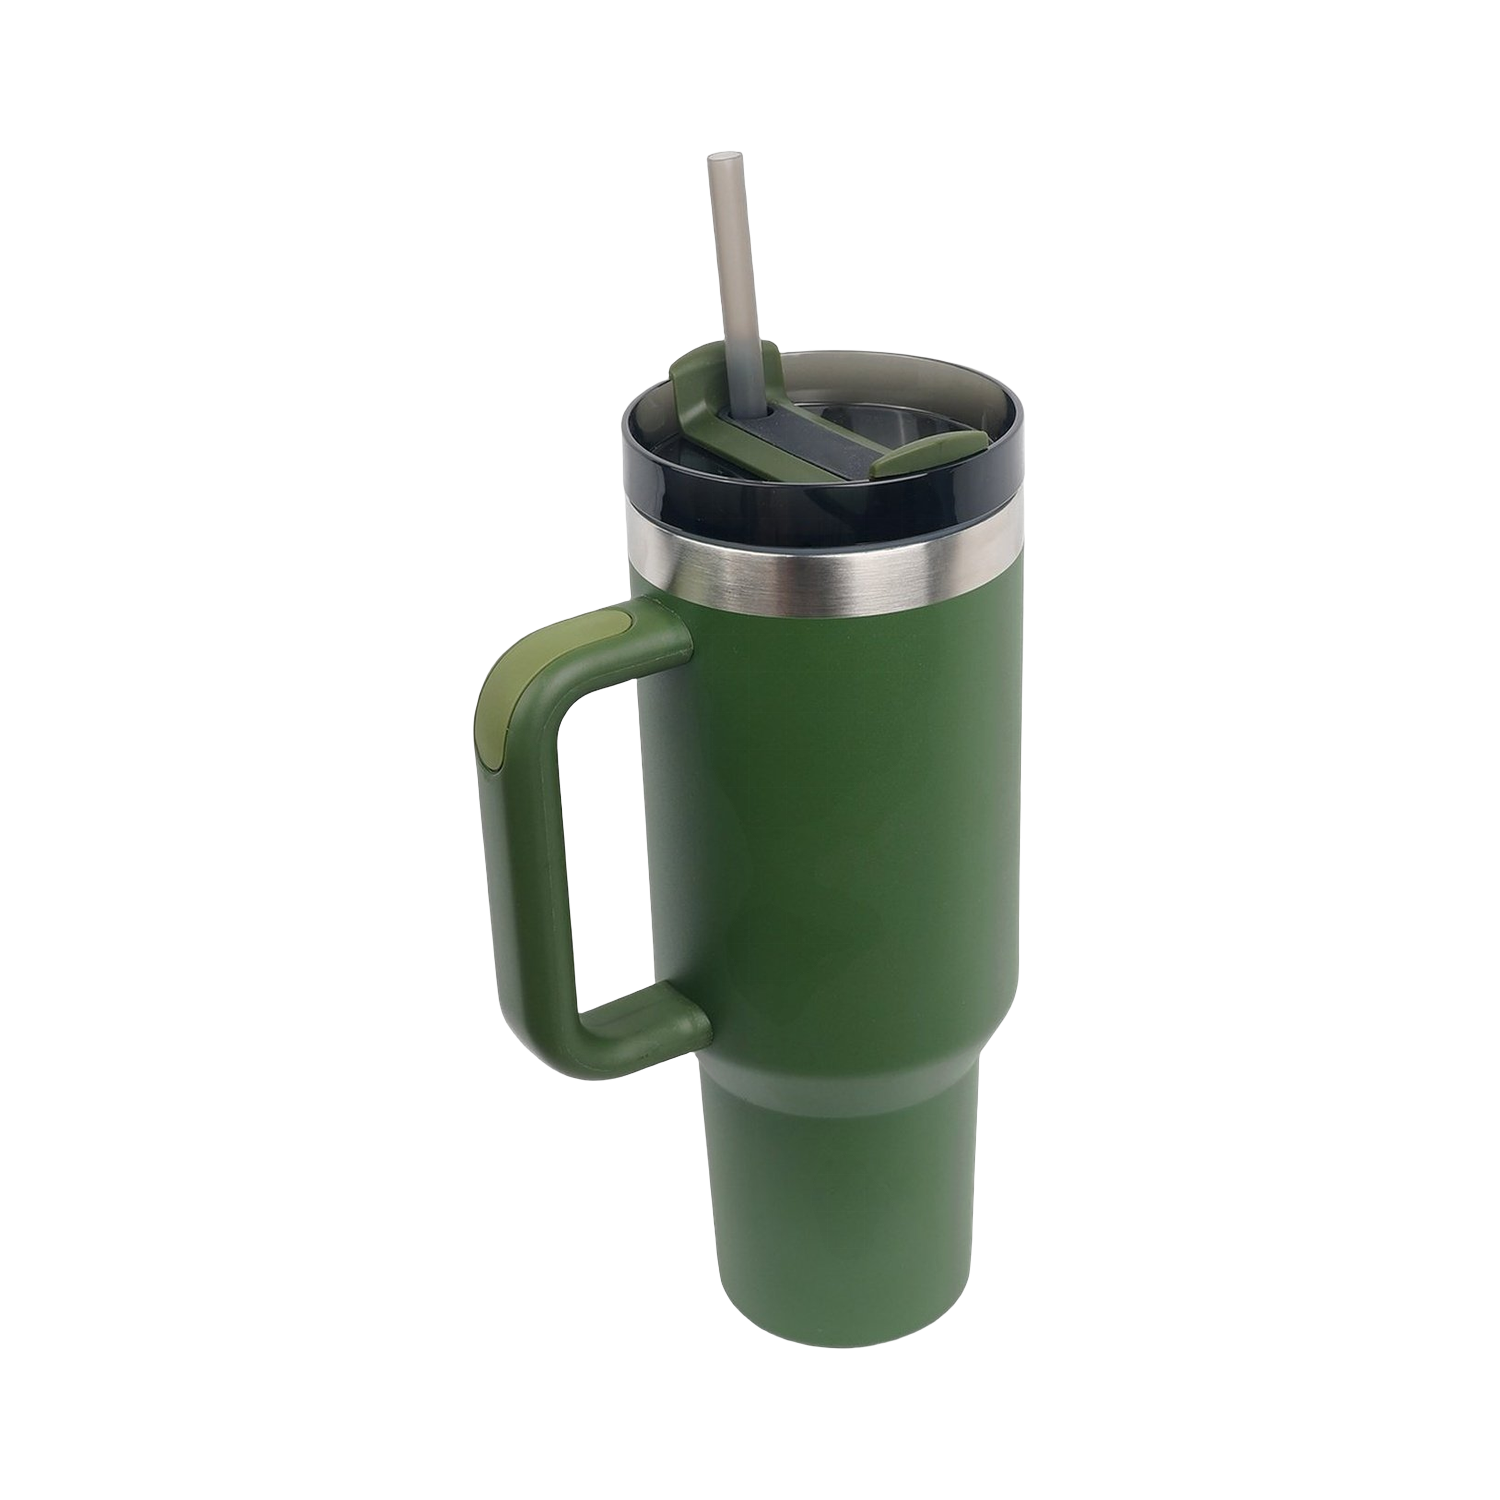
Keeping every colorway consistent
Drinkware is rarely sold in one color. A tumbler range can have ten or twelve colorways, and shoppers compare them side by side on the same page. If one color was shot at a different angle or with warmer light, the range looks like it came from different suppliers.
Three habits keep a range consistent:
- Process every colorway with the same preset, so crop, padding and shadow match.
- Correct color and exposure before the cutout. An AI product photo enhancer can even out photos that were taken under different light.
- Compare the finished colorways in one grid before you publish, not one by one.
Color matters more for drinkware than for most categories, because many shoppers choose by color first and size second.
Choosing scenes that sell drinkware
A plain cutout works for the product page. Ads and social posts need context: where the tumbler is used and by whom. Good drinkware scenes usually match one moment of use.
- At a desk: a laptop edge, a notebook, morning light.
- On the move: a car cup holder, a train table, a gym bench.
- Outdoors: a trail, a campsite, a stone ledge at dusk.
The scene in this example is a quiet outdoor setting: a dark stone plinth, dry grasses and soft evening light that picks out the steel rim. It was made with an AI product photo background generator in a 9:16 vertical format, the shape stories and short video feeds use. No props were bought and no location was booked.
Adding a five second product video
A still photo shows the product. A short video makes a feed stop. From the same scene, an AI product video maker produced a five second vertical clip in which the camera moves slowly toward the tumbler. The light shifts across the rim as it moves, which shows the metal finish better than a still can.
Short clips like this work as the first frame of a product page gallery, as a story, or as the opening of a paid social ad. They do not replace the main white background image that marketplaces require.
Check the small parts before you publish
Generated scenes are convincing, which is exactly why they need a careful look. Compare every new image with the original photo, part by part.
In this example the scene is strong, but the straw came back a warmer, wood colored tone, while the straw in the original photo is grey. For a product page that difference matters: a shopper who receives a grey straw after seeing a tan one has a reason to complain. The fix is simple. Keep the scene for mood and social use, or regenerate it, and always use the original colors in the listing itself.
A quick review list for drinkware:
- Straw, lid and handle colors match the real product.
- Logos and printed text are sharp and unchanged.
- The proportions look right, especially the height of the tumbler against its handle.
- Nothing was added that the product does not include, such as an extra lid or a sleeve.
The online photo editor for ecommerce is there for small corrections after the review, so you do not need a separate design tool.
A drinkware photo routine for the whole range
- Upload the supplier photos for every size and colorway.
- Run color correction, then background removal and a shadow preset on the whole set.
- Review the colorways together in one grid.
- Create one or two scenes for the hero products and check every detail against the original.
- Turn the best scene into a short vertical video for social and ads.
- Save the steps as a rule in bulk image processing, so new colorways follow the same look when they are uploaded.
Your originals are never overwritten, so every edit can be compared with the photo you started from. Costs per image are on the pricing page, and the full tool list is on the products page. The best test is your own range: see it on your catalog.
Questions drinkware sellers ask
Can I get good drinkware photos without a studio?
Yes, if you already have a sharp photo of each product. Background removal, color correction and shadows turn supplier photos into consistent listing images, and scenes and video can be created from the same file.
Will background removal keep the reflections on a steel tumbler?
It should. Reflections on the rim are part of the product, not the background. Check the rim after every edit, because a flat grey rim makes steel look like plastic.
How do I stop colorways from looking different?
Use one preset for the whole range and correct color before the cutout. Then compare all colorways side by side before publishing.
Why check a generated scene against the original photo?
Because small parts can change. In this example, the straw in the scene came back a different color from the real one. The listing should always show the product exactly as it ships.