 Shoupapp
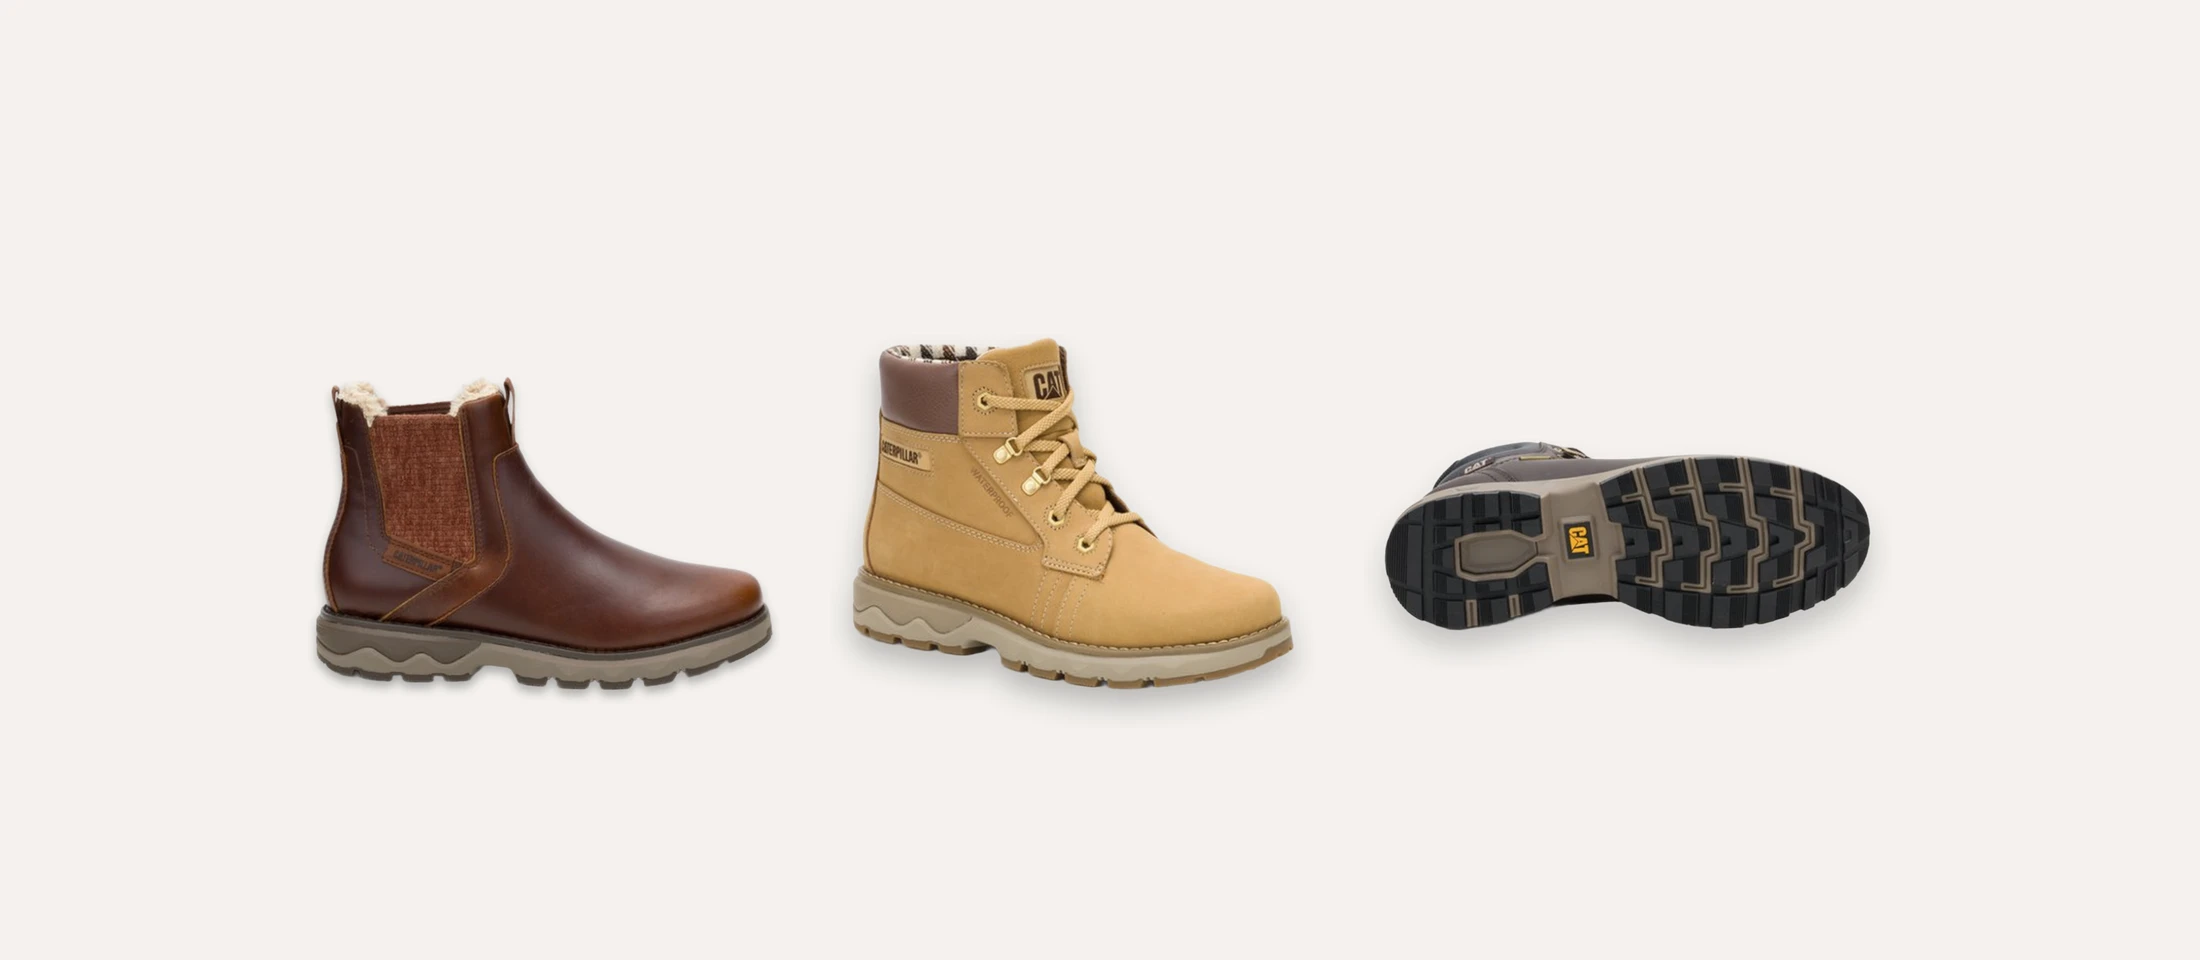
Shoe product photos are usually shot from several angles: a side profile, a three-quarter view, a sole shot and often a few details. A boot on pure white with no shadow looks pasted onto the page, so most stores add one. The catch is that one shadow does not suit every angle. To show the difference, we took three boot photos, removed their backgrounds and applied the same four shadow styles to each one.
If you want the general guide to adding shadows, read how to add shadow to product photos. This article is narrower: footwear only, with the results side by side.
Start from a shadowless cutout, even if the photo already has a shadow
All three source photos already had a shadow. Supplier photos often do, and every supplier's shadow is different: one is hard and dark, another is soft, a third is missing. Put those photos side by side in a category grid and the range looks uneven.
A bulk background remover removes the background and the old shadow together, because the shadow is part of the background. What is left is the boot alone on a transparent layer. From there, one shadow setting can be applied to the whole range, so every boot sits on the page in the same way.


The test: three angles, four shadow styles
Each boot was given the four preset styles from the product shadow generator. Nothing else changed between the panels:
- Contact: a tight, dark line right under the sole, as if the boot is pressed onto a table.
- Soft: a wider, lighter shadow that spreads a little further below the boot.
- Floating: a lower, paler shadow with more distance, so the boot looks lifted off the surface.
- Studio: a shadow that falls slightly to one side, like light coming from a single direction.

The size of each shadow follows the height of the product in the photo, not the size of the file. That is why the flat sole shot gets a smaller shadow than the tall lace-up boot while both keep the same character.
Side profile: Contact or Soft
The side profile is the main image for most footwear, and the outsole is a straight line along the bottom of the frame. A shadow that hugs that line is all it needs.


Contact keeps the image crisp and works well in dense category grids. Soft reads a little warmer and suits a product page or a banner. Floating looked wrong on the side profile in our test: a boot shown flat from the side is clearly standing, so a lifted shadow contradicts what the eye sees.
Three-quarter view: Soft
The three-quarter view shows the toe, the laces and the side at once, and the sole meets the ground along a curve rather than a line. Here Soft gave the most natural result. Contact was almost invisible under the angled sole, and Studio added a sideways direction that competed with the angle of the boot itself.
Sole shot: Floating, or no shadow at all
A sole shot is a boot turned over to show the tread. It is not standing on anything, so a Contact shadow makes little physical sense. Floating gave the sole a presented look, as if the boot were held up for inspection, while still separating the dark outsole from the white page.

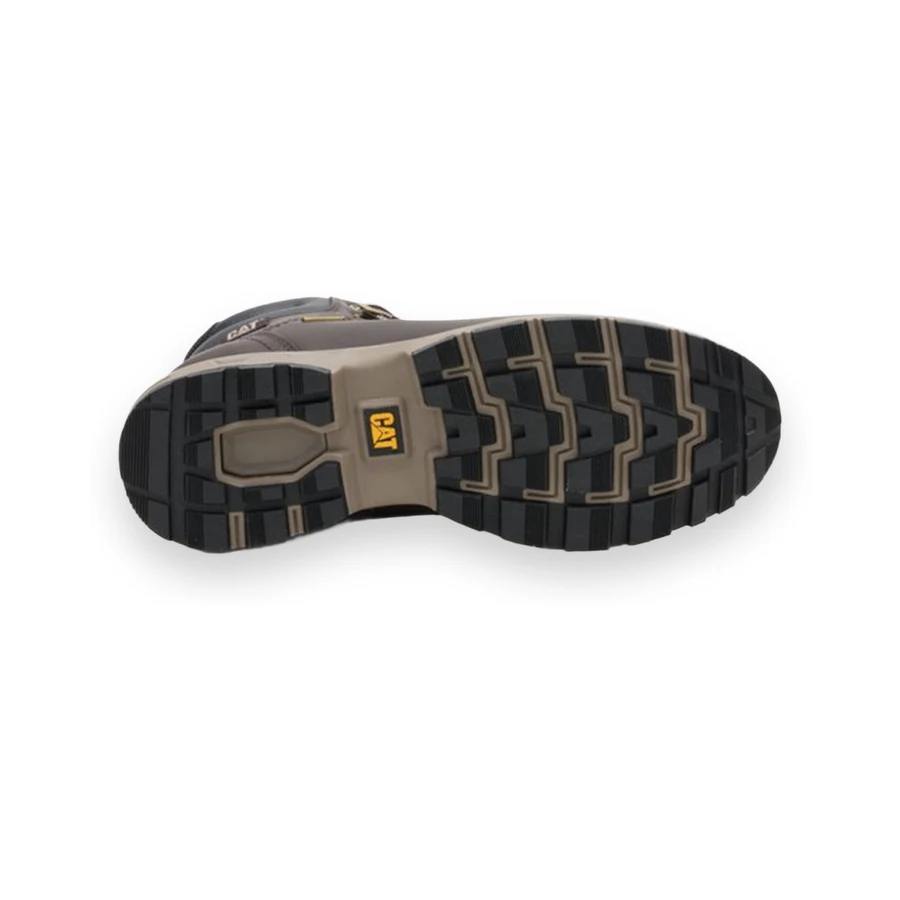
For marketplaces that prefer the plainest possible images, leaving the sole shot without a shadow is also a fair choice.
One shadow per angle, not per product
The practical rule from the test is to choose the shadow by angle and use it for every product in the range. A shopper flicking through a gallery should see the angle change, not the lighting.
| Angle | Shadow that worked | Why |
|---|---|---|
| Side profile | Contact (grids) or Soft (product page) | The sole is a straight line that sits on the ground |
| Three-quarter view | Soft | Contact disappears under the curved sole |
| Sole shot | Floating or none | The boot is not standing, so a contact shadow looks wrong |
| Detail crops | None | A shadow adds nothing to a close-up of stitching or a buckle |
What a shadow cannot fix
- A rough cutout. The shadow follows the outline of the product. If a lace or a pull tab was cut badly, the shadow repeats the mistake. Check the edges first.
- Very dark soles. On a black outsole a light shadow can vanish. The Custom setting lets you raise the opacity or change the color for that range.
- Photos that keep their background. If you add a shadow without removing the background, the original background stays and the shadow is cast around the product instead. That is useful for lifestyle shots, not for a white catalog.
Small fixes after the shadow, such as a stray edge, can be done in the online photo editor for ecommerce.
Applying it to a whole footwear range
In bulk processing you tick background removal and shadow together, choose the style, set the background color and the maximum file size, and run the batch. To treat angles differently, run the side profiles, three-quarter views and soles as separate batches, or save each combination as a rule in bulk image processing so new photos get the right shadow when they are uploaded. Originals are never overwritten, so changing your mind later is a new run, not a reshoot. Costs are on the pricing page and every tool is on the products page. The best test is your own range: see it on your catalog.
Footwear shadow questions
My supplier photos already have a shadow. Should I keep it?
Only if every photo in the range has the same one. Otherwise remove the background, which removes the old shadow too, and apply one style to everything.
Which shadow is safest for marketplaces?
Contact. It is subtle, it keeps the background pure white around the product and it reads well at thumbnail size.
Should every angle of the same shoe use the same shadow?
No. Use one shadow per angle across the range. The side profile and the sole shot need different treatment.