 Shoupapp
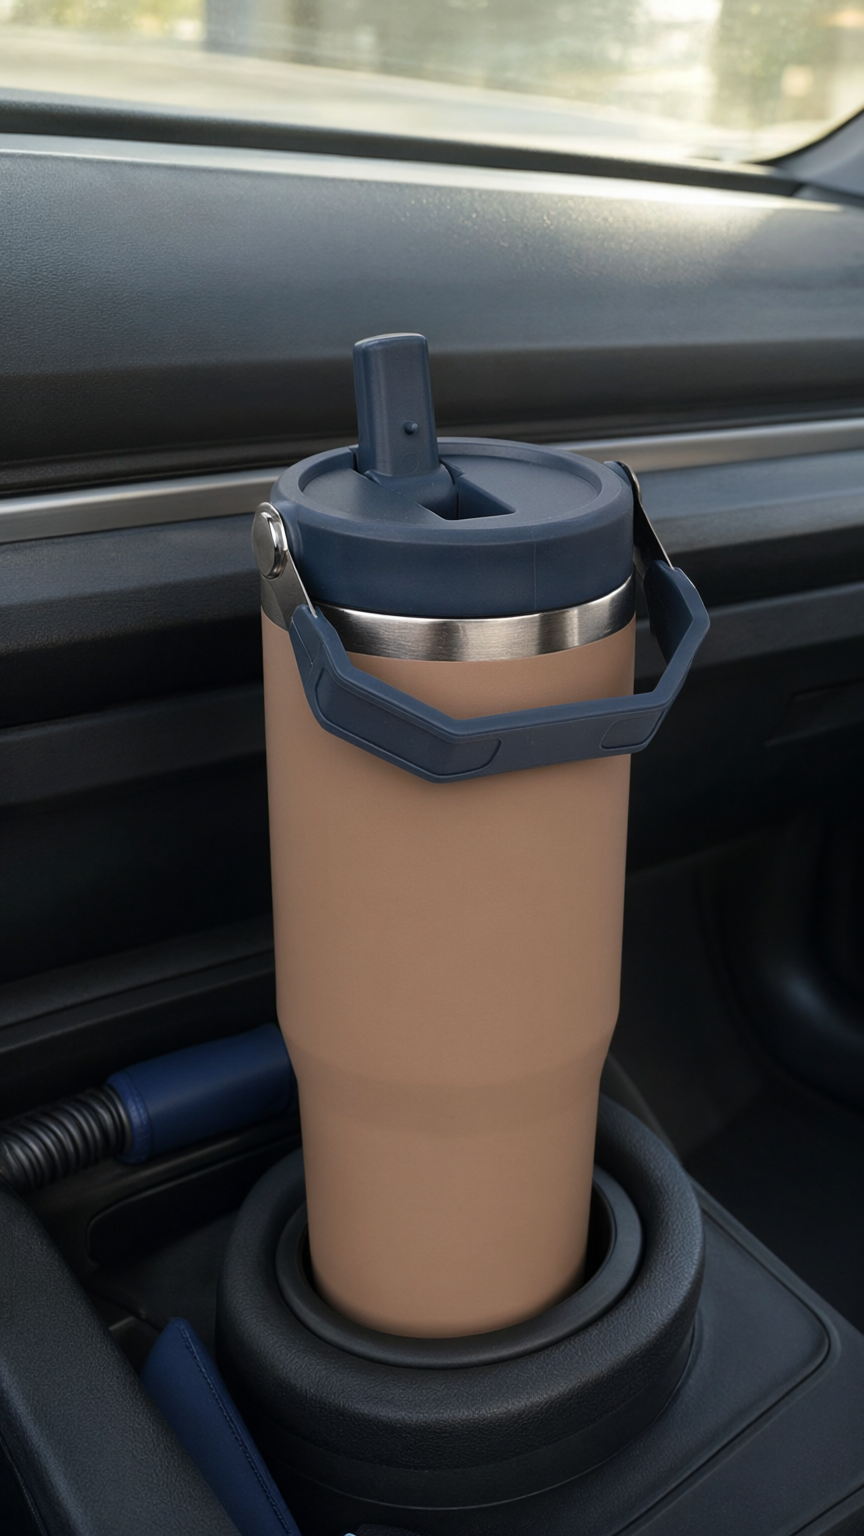
A white background tells a shopper what a product looks like. It cannot tell them how big it is, where it goes or whether it fits. A photo of the product in use answers those questions, but only if it looks real. An object that floats, is too large for its holder or carries a label it does not have does more harm than an empty white background. We put one catalog photo of a travel tumbler into a car, made a ten second video from the scene and checked every detail a buyer would check.

Four checks that decide whether a product photo looks real
People judge realism in a moment, and they judge it by the same few things every time:
- Scale. Is the product the size it would be next to the objects around it?
- Contact. Does it touch what it stands on, with a shadow where the two meet?
- Light. Does the light on the product come from the same place as the light in the scene?
- Surface. Are the color, finish, parts and markings those of the real product, and nothing more?
Scale and fit: does it sit where it should?
A cup holder is a strict test, because everyone knows roughly how big one is. Here the narrow lower part of the tumbler drops into the holder, the rubber ring hides its base, and the wider upper body rests above it, which is how a tumbler of this shape sits in a real car.

The image says the tumbler fits a cup holder. It cannot promise that it fits every car, so put the base diameter in the product description and let the photo show the idea. A photo suggests, the specification confirms.
Light and surfaces
The car is darker than a studio, and the scene treats the product that way:
- The body color stayed true. We sampled the matte body. It is the same peach in the scene, a little darker, as you would expect in a car interior.
- The steel reflects the car. The steel band below the lid picks up the dark cabin instead of the white studio, which is one of the details that makes the photo read as taken on the spot.
- The parts are all there. Lid, straw, hinge, steel band and handle are in the same places as in the catalog photo.
The video: one slow take around the lid
The product video tool made a ten second clip with no cuts. The camera moves slowly in toward the lid and then back out, so the viewer sees the whole tumbler, the top up close and the tumbler in place again.

A single take suits drinkware. The viewer sees the tumbler sitting in the holder, then the lid, straw and handle up close, then the whole tumbler again, so size, parts and finish come across without a cut. Use it as a short loop on the product page after the photos, or as a vertical post with your caption over the last seconds. More drinkware scenes are in drinkware product photography.
Where an in-use photo earns its place
A realistic scene does not replace the white background. It sits next to it:
| Placement | Which image | Why |
|---|---|---|
| Product page gallery | White cutout first, the in-use photo second | The first image shows the product, the second shows how it is used |
| Marketplaces | In-use photo as an extra image | Many marketplaces ask for a plain background on the main image |
| Social posts and ads | The scene or the video | A familiar place stops the scroll better than a white square |
| The scene as a still | It loads everywhere and links to the product |
A realism checklist for hard goods
- Compare the size with something familiar in the scene: a holder, a hand, a table.
- Look for a contact shadow where the product meets the surface.
- Check that reflections on metal and glass show the scene, not a studio.
- Hold the color next to the real product, on a screen you trust.
- Count the parts: lids, straws, handles, hinges, buttons.
- Look for text, labels or logos that the real product does not have.
- Read every sign and screen in the background.
Drinkware has its own traps, such as clear lids and colorways, covered in drinkware product photography. Garments are checked differently, see realistic AI fashion photos.
Make a realistic in-use photo from your own product
Start from one clean catalog photo. Make the white cutout with the background remover, build the in-use scene with AI product photos and turn it into a clip with the product video tool. For a whole range, batch processing runs the white images in one job. Originals are never overwritten. Costs are on the pricing page and every tool is on the products page. Pick the product your customers ask most questions about: see it on your catalog.
Realistic product photo questions
What makes a product photo look realistic?
Correct scale, a contact shadow, light from the same direction as the scene, and a surface that matches the real product.
Can an in-use photo replace my white background image?
No. Keep the white image first and for marketplaces, and add the in-use photo next to it.
Is one take enough for a product video?
For a simple product, yes. A slow move in and out shows size, parts and finish without cuts.