 Shoupapp
To edit multiple photos at once you need two things: a way to pick the photos and a way to say what should happen to all of them. Together those two choices are a batch request. In Batch Edit, one request can cover up to 1,500 product photos and switch on eight edits in the same run: background removal, shadow, resize, padding, crop, enhancement, pixel repair and logo. This article walks through a request from start to finish, shows a real batch of six photos, and covers the extra actions you can run on the same selection, such as new angles, upscale and unblur.
What a batch request is
A batch request has three parts.
- The selection: which photos, from a handful to 1,500.
- The edits: every operation you switch on, applied to every photo in the selection.
- The output: one size and one file format for the whole batch.
You set it up once and send it. The work then runs in the background while you do something else, and every result appears next to its original. Nothing is edited photo by photo, and nobody has to remember the settings for the next folder.
Step 1: choose the photos
The list at the top of Batch Edit is a filter over your whole catalog. You can narrow it by name, SKU, barcode or tags, and by status: all photos, only the ones not updated yet, or only the updated ones. The page size goes from 50 up to 1,500, and the checkbox at the top of the list selects everything on the page.
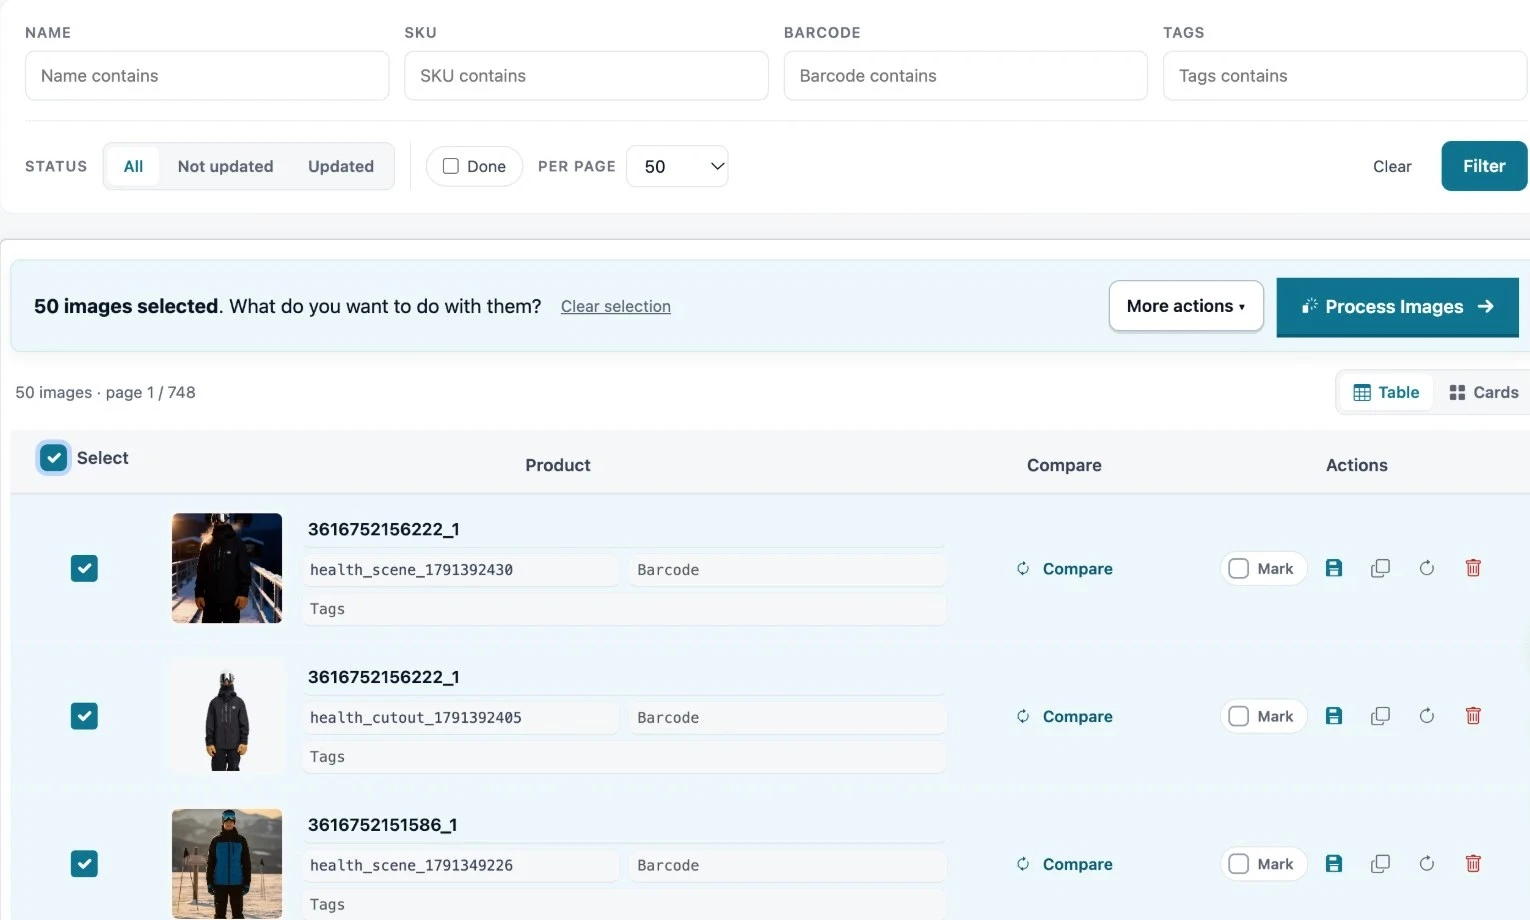
Two habits make large selections safe. Tag photos by client, season or product type when you upload them, so one filter finds the right set. And use the Not updated status, so a second request never picks up photos that are already finished.
Step 2: switch on the edits
Process Images opens one dialog for the whole selection. On the left are the eight operations, each with a switch. On the right are the output size and format. Everything you switch on is applied together, in one run.
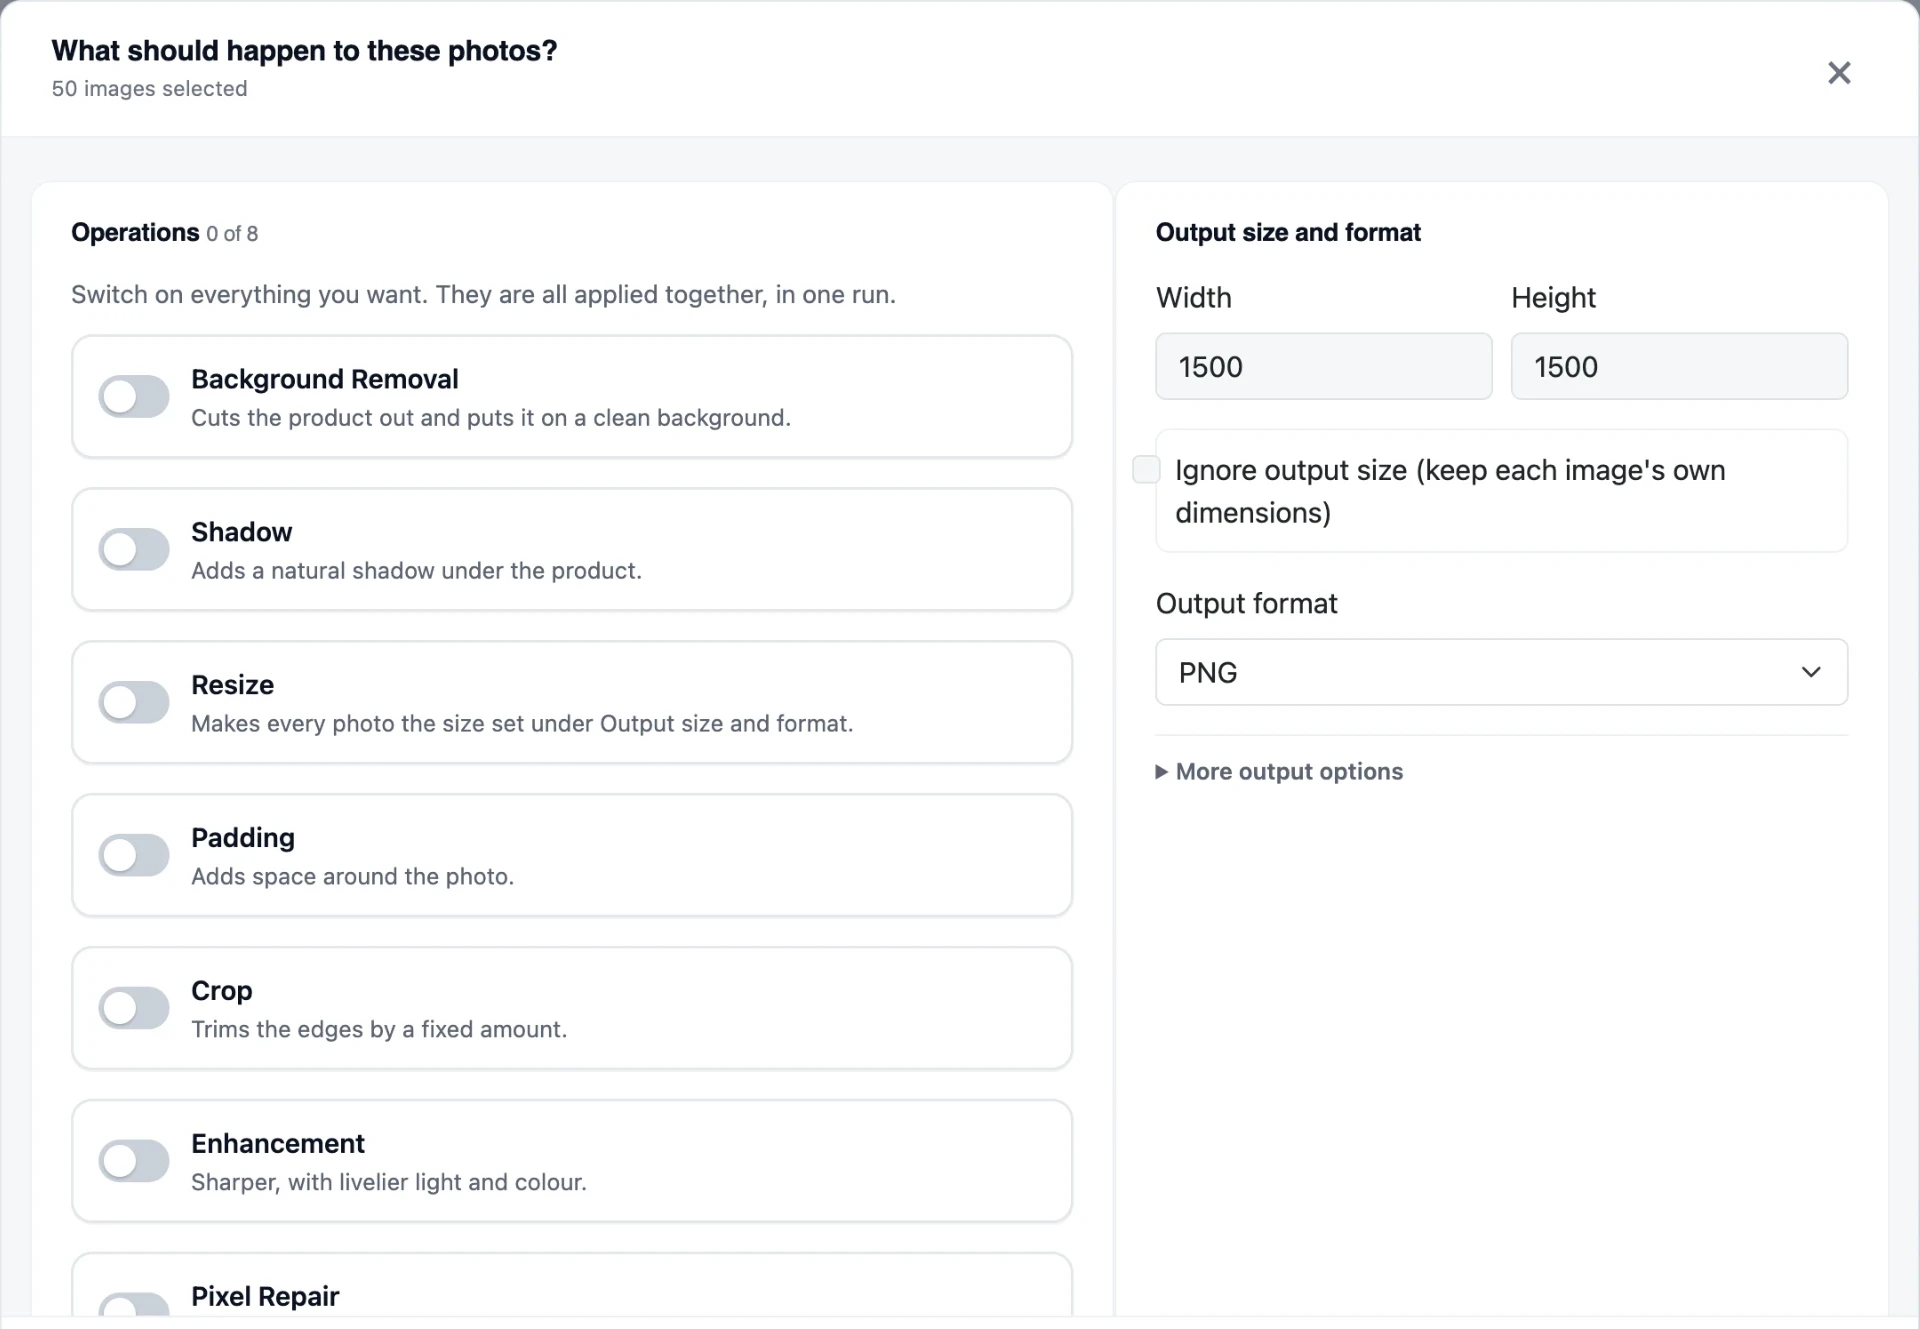
| Operation | What it does |
|---|---|
| Background Removal | Cuts the product out and places it on a clean background |
| Shadow | Adds a natural shadow under the product, in the style you pick |
| Resize | Makes every photo the size set under output size and format |
| Padding | Adds space around the photo |
| Crop | Trims the edges by a fixed amount |
| Enhancement | Sharper, with livelier light and color |
| Pixel Repair | Cleans noise and blocky pixels and restores fine detail |
| Logo | Places your logo in the same corner of every photo |
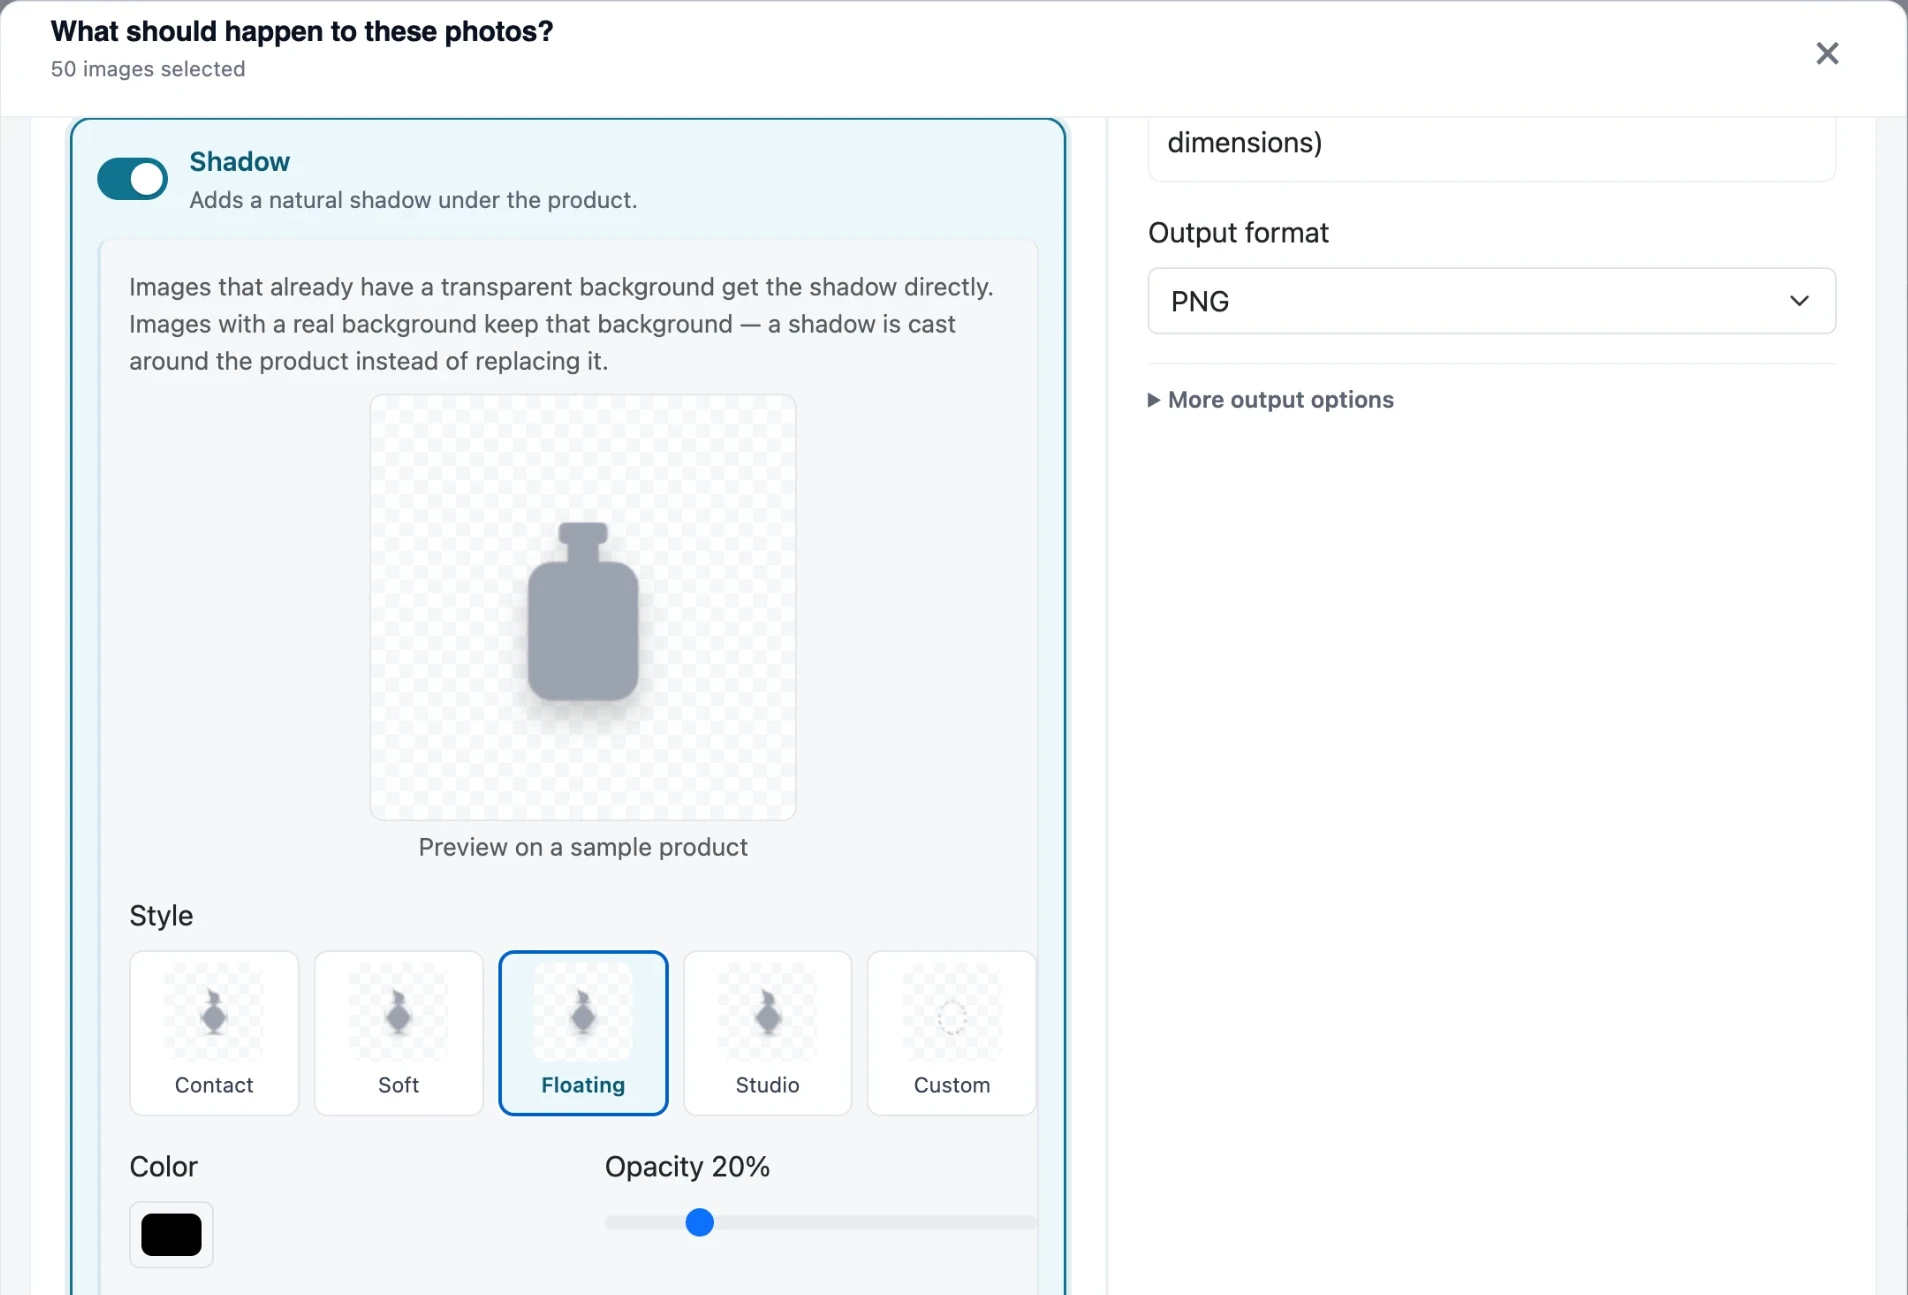
You do not have to think about the order. Selected operations always run in the same sequence, and the reasons are in why step order matters in a batch edit. Operations that need choices open their own settings. Shadow, for example, shows a preview on a sample product while you pick a style, a color and an opacity.
A real batch: six photos, four backgrounds, one result
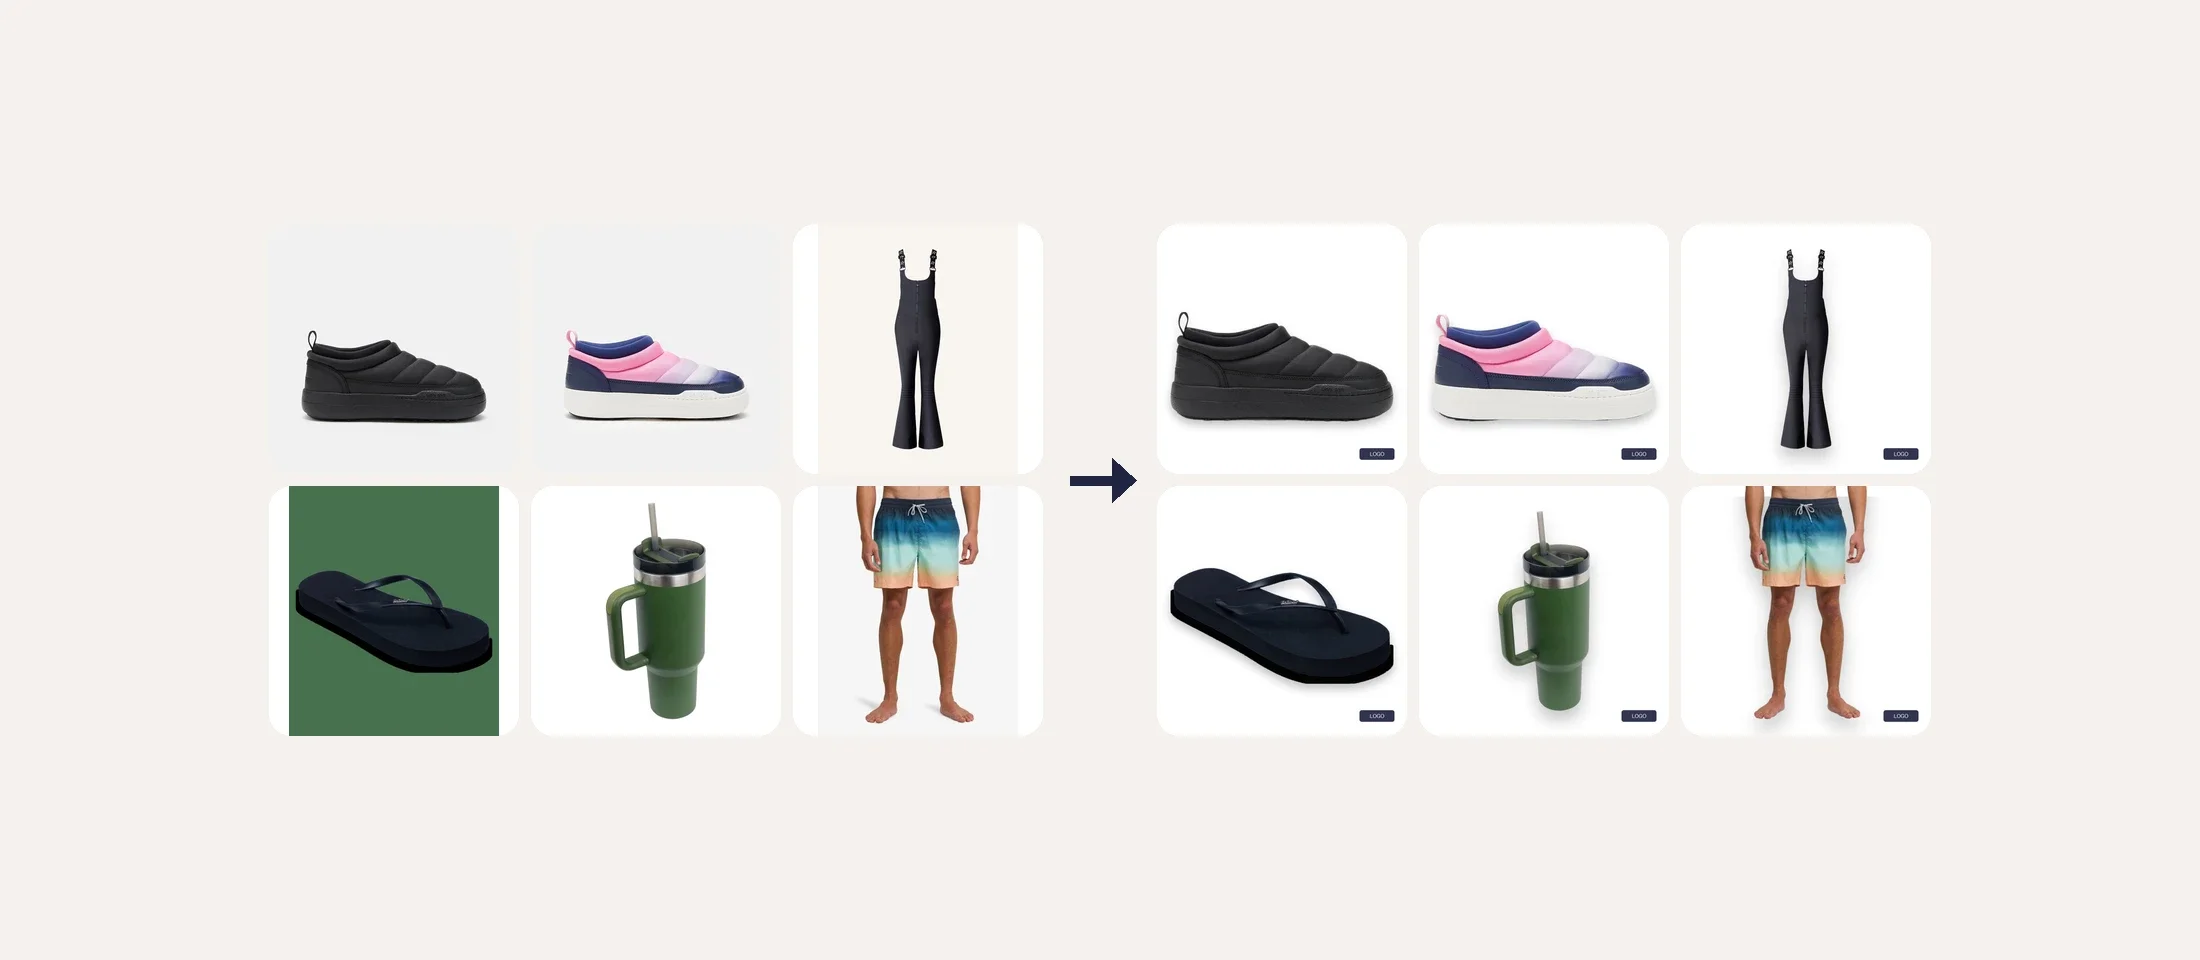
We sent six photos through one request with four edits switched on: background removal, soft shadow, resize to a 1,500 pixel square and a logo. The photos came from different shoots. Two were on gray, one on cream, one on green, one on white, and one was a model photo.
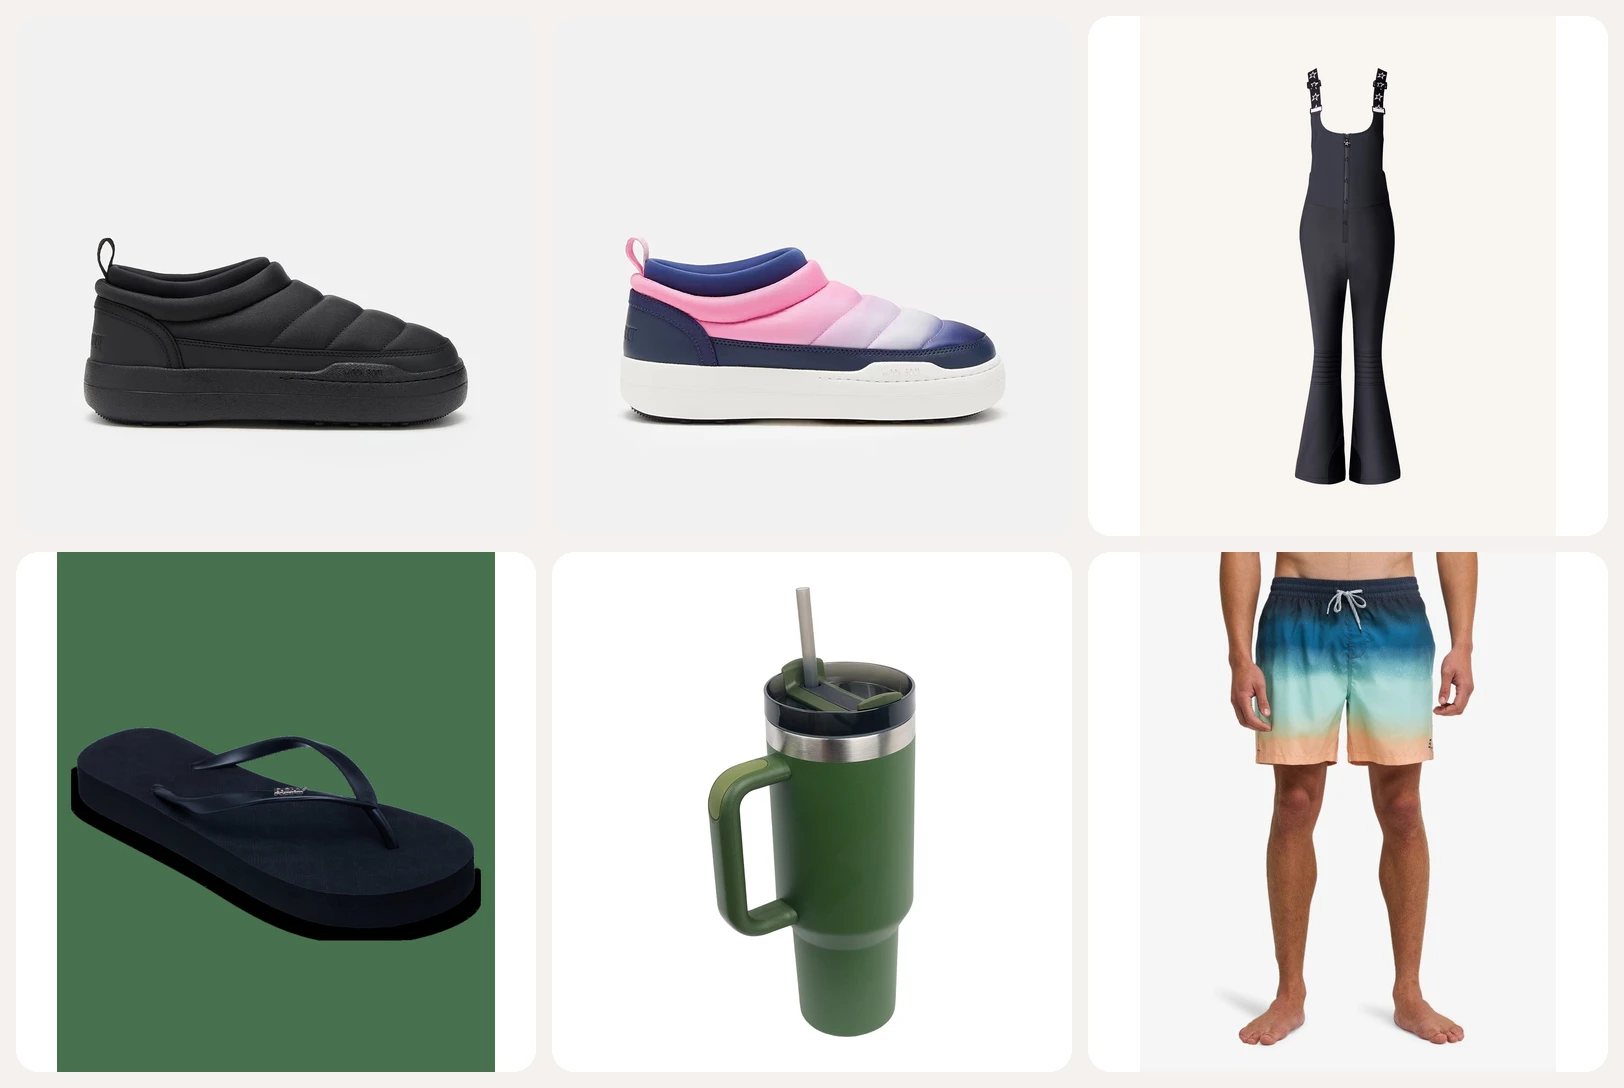
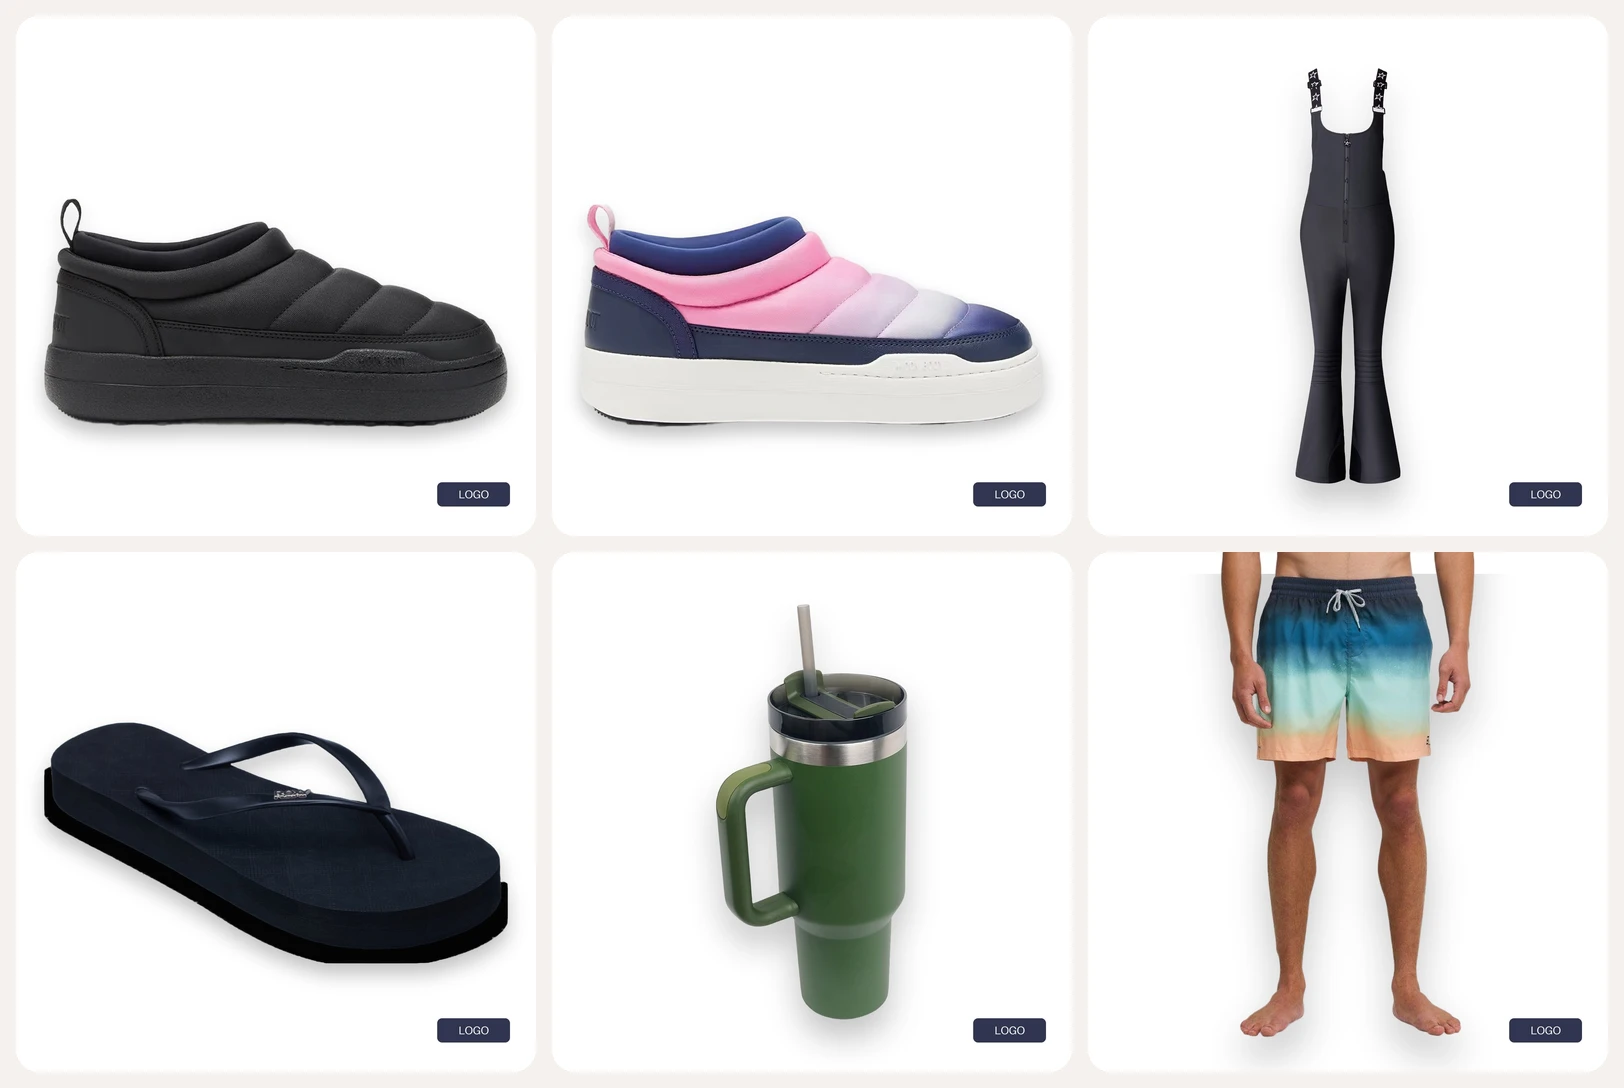
What the result shows:
- Four different backgrounds became one. The green backdrop behind the flip-flop is gone without a green edge.
- Every product sits on the same square canvas with the same margins, so the grid lines up.
- The sample logo is in the same corner at the same size on all six.
- One thing did not change, and should not be expected to: the model photo was cut off at the waist by the original frame, and it is still cut off there. A batch request cannot add what the photo never showed.
More actions on the same selection
Process Images is the main button. The menu next to it, More actions, runs other jobs on the photos you have selected.
- Generate Angles creates a new view of each product, such as a three-quarter view from a side photo.
- Upscale brings a small photo up to 2K on its long edge.
- Unblur sharpens photos that are soft or slightly out of focus.
- Send to the photo editor, download everything as one ZIP (up to 1,500 images or 2 GB), update tags by hand, or revert photos to the original.
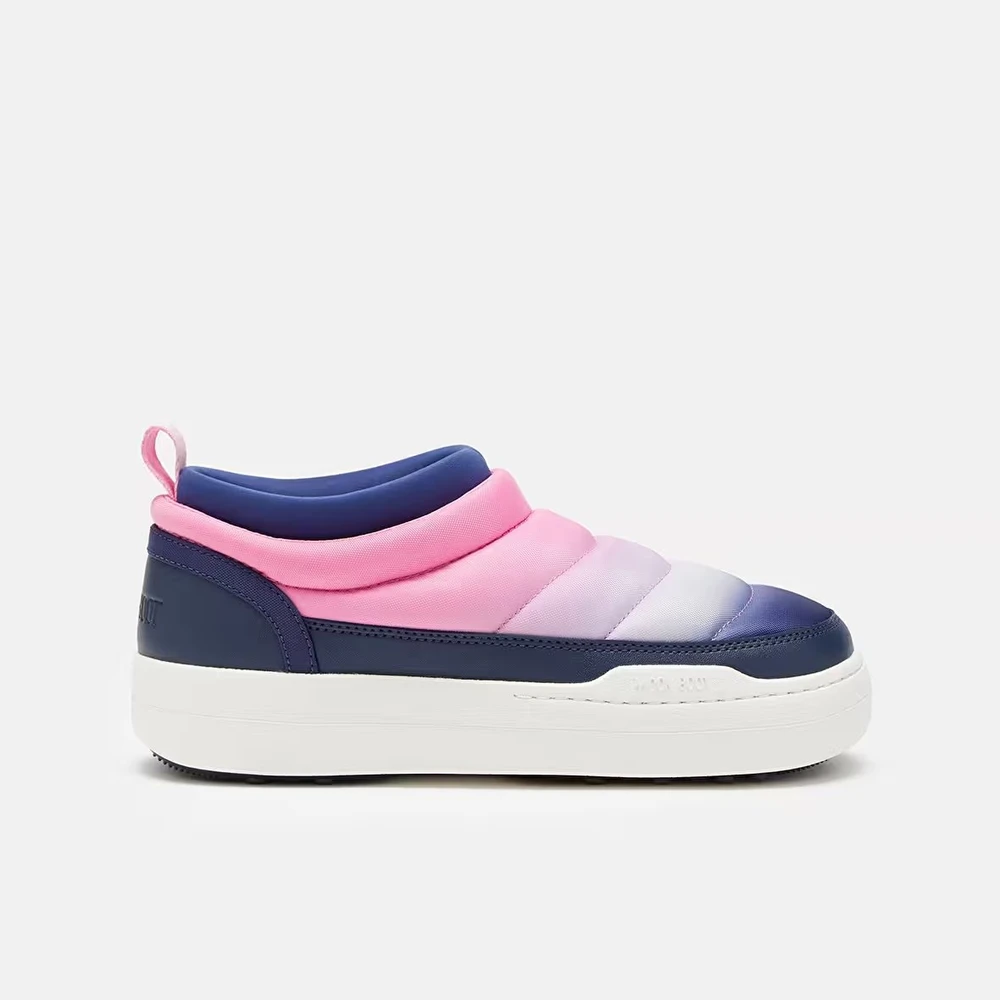
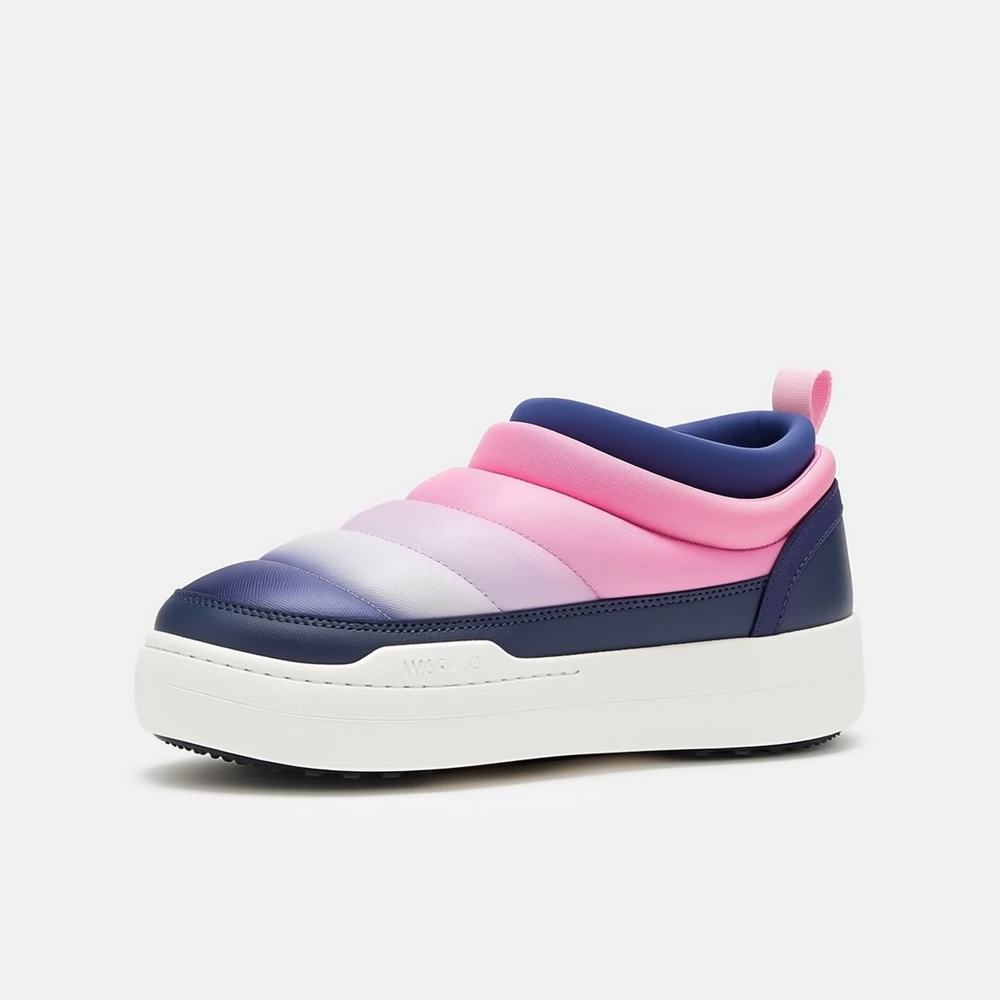
A generated angle is a new image, so check it against the product: the shape of the sole, the heel tab and any small text. The same goes for upscale. In our test a 505 by 692 pixel photo came back at 1,488 by 2,048 with clearer fur and a cleaner sole edge, and the framing moved very slightly.

Limits worth knowing
| Limit | Value |
|---|---|
| Photos in one request | Up to 1,500 |
| Photos in one ZIP download | Up to 1,500 images or 2 GB |
| Upscale result | 2K on the long edge |
| Originals | Never overwritten; Revert to Original restores them |
The dialog shows what the request will cost before you start it, so there is no surprise at the end of a large batch.
How to plan a large batch request
- Run ten photos first. Include your hardest cases: dark products, thin straps, model photos.
- Split by what needs different settings. Side views and sole shots, or products and model photos, are better as separate requests.
- Use Compare on a few results to see the original and the edit side by side.
- Mark finished photos as done, so the next filter leaves them out.
- Download the batch as one ZIP, or send single photos to the online photo editor for ecommerce for a final touch.
From a batch request to automation
A batch request is something you start. When the same request comes back every week, save it as a rule in bulk image processing and let it start on upload or on a schedule. Every step of that canvas is explained in the photo automation workflow guide. The single tools are on their own pages: bulk background remover, product shadow generator and AI product photo enhancer. Costs are on the pricing page and every tool is on the products page. The best test is your own folder: see it on your catalog.
Batch request questions
How many photos can I edit at once?
Up to 1,500 in one batch request. For a larger catalog, send the next 1,500 as a second request or set up a rule that runs on a schedule.
Can I combine background removal, shadow, resize and logo in one request?
Yes. Every operation you switch on is applied in the same run, and they always run in the same order.
Are angles, upscale and unblur part of the same run?
They are separate actions under More actions, run on the same selection of photos.